Garden sheds and storage buildings are usually not heated. The natural extremes between warm and cool can cause internal condensation. The only way this will occur is if there is any internal moisture. This is why the preparation of the base is so important. The building itself, no matter how expensive, will not prevent condensation occurring, particularly in the colder months. It is important to protect your building from moisture from the ground as well as the sky!!
Metal Sheds and plastic Sheds will only suffer from condensation when dampness is present in the foundations. The air inside the shed is always slightly warmer than outside and therefore, any moisture in the foundation base will rise until it touches the cold roof panels. The moisture then condenses, drips down and becomes part of the cycle again. This condensation cycle is difficult to stop so it is important to minimise dampness at the outset.
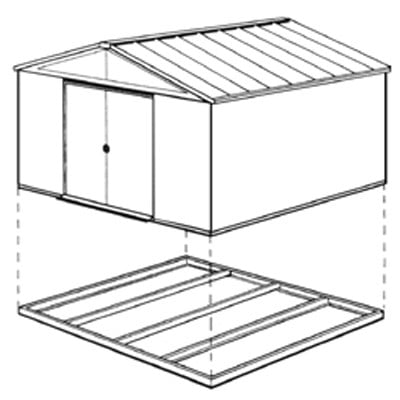
All steel and plastic sheds must be anchored to a firm foundation to protect against wind damage.
THESE ARE THE FOUR RECOMMENDED GARDEN SHED BASES:
TIMBER BASE
FOUNDATION KIT
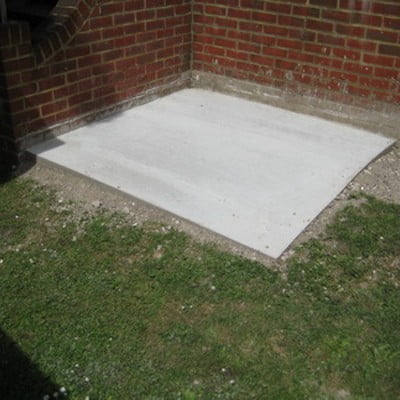
CONCRETE BASE
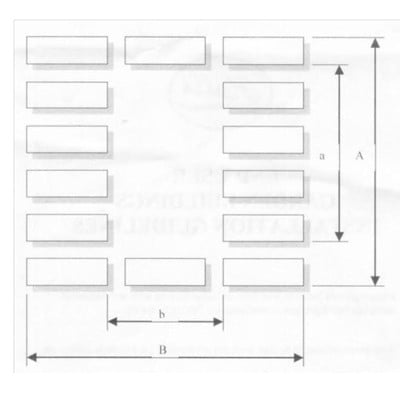
PAVING SLABS
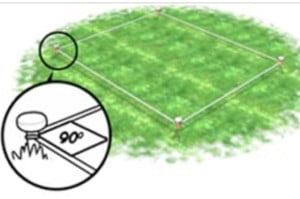
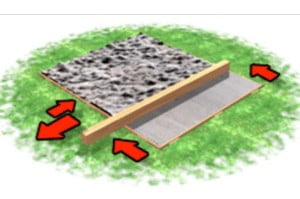
In all cases of Garden Shed base preparation, the ground must be level
BASE INSTRUCTIONS TO PREVENT CONDENSATION
The concrete slab base should flat and level and needs to be a few inches larger than the base rail size of the shed, e.g. a shed with base rail measurements of 93″ x 70″ should have a foundation measuring of 96″ x 73″. Excess water outside the shed must have an escape route away from the building.
The foundation should contain a damp-proof membrane which should be inserted into the base at least 2″ higher than the surrounding land area. This prevents water drainage from the immediate surrounding soil running onto the base surface.
The foundations of the shed should be allowed to ‘cure’ for at least 7 days after casting the concrete, longer if the atmosphere is damp. If this is not done, the water drying up from the concrete will provide amble moisture content to set up a condensation cycle.
After bolting down the shed to the concrete or slabs, apply mastic sealant to the inside of the shed base rails not the outside. This is to preserve the drainage capability of the channels whilst preventing water seepage under the rails and into the shed interior.
CREATING A CONCRETE BASE
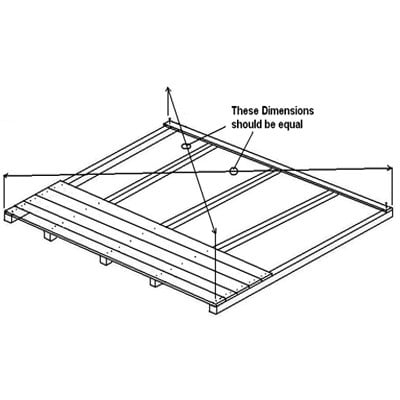
Decide where to position the building in an optimal space, allow enough distance from hedges or fences for easy access to all sides. Using pegs and string to mark out the base to the dimensions of the shed/foundation kit and measure diagonally to ensure the area is square. To get this to the right size you could build the foundation kit/shed base rails first and marks out using the outside edge of the framework.
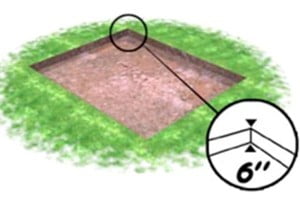
A Concrete base requires 3 inch (7.5 cm) of compacted hardcore (not supplied) underneath the 3 inch (7.5cm) concrete layer. The base can be level with the ground or raised above it. If it is to be level excavate the top earth to 6 inch (15cm) to allow for the hardcore layer and the 3 inch (7.5cm) thickness of concrete. Level the area with a rake and remove the pegs.
Set up leveled framework if you have not got a foundation kit. Spread a layer of well compacted hardcore and cover with a liberal amount of sand. (Hardcore and sand not supplied)
Place a DPC (Damp Proof Membrane) on top of the sand. This is to prevent rising damp once the concrete has set. (Please note that the illustration is just to show the DPC, only use timber framework if you do not have the foundation kit option, as the foundation kit has its own shuttering). (DPC not Supplied).
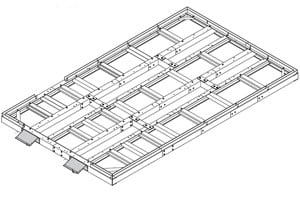
Construct the foundation kit (if not already built) and lay it into your working area.
Lay DPM (Damp Proof Membrane) and mix the concrete (not supplied) using one part cement to five ballast or use bags of dry-mixed concrete to which you just add water. Small amounts of water should be added at a time and mixed into the concrete mix to ensure excessive amounts are added making the cement sloppy, as the concrete should be kept on the dry side.Spread the concrete evenly and slightly proud of the framework. This can be levelled off to the top of the foundation kit frame with a long straight edge of timber resting on the edges of the foundation kit or top of the formwork using a sawing motion slowly (as shown below) over the entire surface of the freshly laid concrete.
You should be able to see the top surface of the foundation kit flush with the concrete.
If wet weather is forecast, cover the concrete with polythene for 24-hours. In warm weather cover the base with damp sacks and sprinkle them with water over the 24-hour period, this will ensure the drying concrete will not shrink or crack.
The result is a smooth, sound, level base. The perfect foundation for the construction of an outdoor storage building.
CONDENSATION IN METAL AND/OR SINGLE WALL VINYL CLAD SHEDS
Metal, or single walled vinyl clad sheds will suffer from condensation where dampness is present.
This situation is similar to condensation forming in any enclosed, unheated, and insufficiently ventilated space. The air inside the shed is always slightly warmer than the outside of the shed. Any moisture in the foundation, or seepage from the outside will rise until it hits the cold roof and wall panels. It condenses into water droplets, drips down and becomes part of the cycle again.
As these types of sheds are of the self-assembly type, and normally supplied WITHOUT a floor, it is particularly important to ensure that the product is assembled correctly. Check that each washer under every screw (or plug) in the roof is intact and that there is no water ingress from any other screw/plug or bolt used elsewhere in the shed. Correct overlapping of all roof and wall panels is of particular importance.
IT IS IMPORTANT TO PREVENT DAMPNESS AS FAR AS POSSIBLE. THE FOLLOWING POINTS ABOUT BASE CONSTRUCTION ARE IMPORTANT – AND SHOULD BE FOLLOWED ACCURATELY:
The concrete, or slab base, should only be marginally larger than the base rails of the shed, i.e. a shed with base rail measurements of 93” x 70” should ideally have a foundation of 95” x 72”. A level base for any of these sheds is vital.
The concrete, or slab base, should contain a damp-proof membrane (sized to the entire surface area the shed will occupy). This should be inserted below the flags, or 2” below the surface of the concrete slab. Make sure that the surface of the slab, or concrete foundation, is some 2” above adjoining soil levels.
Purpose laid concrete bases should be allowed to ‘cure’ for at least seven days – longer if the atmosphere is damp. If this is not done, the water drying up from the concrete plinth will provide ample moisture to set up a condensation cycle.
After securing the shed to the slab, or concrete base, apply a Silicone sealant to the inside of the shed’s base rails (NOT the outside). This will preserve the drainage capability of the channels within the base rails whilst preventing water seepage under the base rails and into the shed interior.Even if a shed is supplied with an integral floor we recommend that a base is prepared which is solid with a damp proof membrane placed underneath to prevent the damp/condensation cycle from commencing.
IF THE BASE HAS ALREADY BEEN CONSTRUCTED, OR IS OVERSIZED AND A PROBLEM OF CONDENSATION IS APPARENT:
Remove the shed from its base and build (or buy from the retailer) a timber floor/base that is supplied with timber bearers. The timber floor is sized for the entire shed to sit ON the timber floor. Fix the shed to the surface of the timber floor with wood screws and washers through the shed’s base rails – then apply the Silicone sealant as in 4) above. The timber floor, with its bearers below, will allow air flow under the entire shed. Ensure that water from adjacent soil levels does not pool under the timber floor.
Obtain the cheapest polystyrene tiles available with a view to applying them to the entire internal roof area.
Thoroughly clean off the underside of the roof panels and ensure that the panels are dry. Apply the polystyrene roof tiles – this work is best carried out on a warm, dry day. This insulation will obviously NOT remove the moisture from the atmosphere inside the shed, but will prevent it condensating due to its obvious insulation properties.
If you have any other questions or would like to know more on preventing condensation or constructing a base, please do not hesitate to contact: